この記事はAndroidスマホ用のアプリ開発の中で、
今後の開発で再使用性が高いと思われるコーディングをまとめたものです。
Javaでの開発経験、XML構文規則、Androidのアプリ開発経験がある方を対象としています。
Androidのアプリ開発でお役にたててれば、嬉しいです。
(これからAndroidのアプリ開発やJavaでの開発を始めたい方への案内は、記事の最後で紹介します)
OpenWeatherMapのWebAPI を使用して、気象情報をアプリで扱う
WebAPIをフルに使用したデバイスといえば、Echo showでしょう♪
YouTubeの音楽コンテンツの再生、リモコン操作など、とても便利です♪
ポイント
WebAPIを使用することで、インターネット上のさまざまな情報をハンドリングすることが可能です。
WebAPIに HTTP(HTTPS)でリクエストし、レスポンスをJSONで受信して、アプリに連携します。
OpenWeatherMapのWebAPIを使用して、アプリから気象情報データをハンドリングする機能を実装します。
GPS位置情報の取得
OpenWeatherMapのWebAPIを利用する際に、現在位置(緯度・経度)を指定する必要があります。
GPSを使用して、位置情報を取得します。
◎マニフェストファイルへの権限指定
位置情報を取得する場合、マニフェストファイルへの権限指定が必要です。
ネットワークからおおよその位置情報を取得する権限と、GPSから精度の高い位置情報を取得する権限の2つを指定します。
<manifest
    :
    <uses-permission android:name="android.permission.ACCESS_COARSE_LOCATION"/>
    <uses-permission android:name="android.permission.ACCESS_FINE_LOCATION/">
:◎権限チェックとユーザ承認と位置情報の取得
位置情報を取得する権限について、ユーザ承認の有無を確認し、ユーザ承認がない場合は、ユーザ承認画面を表示します。
ユーザ承認がある場合は、位置情報を取得します。
位置情報の取得では、取得できないケースを想定し、タイムアウト処理を実装します。
:
public class MainActivity extends AppCompatActivity
        implements FusedLocationManager.OnLocationResultListener {
  :
    private static final int        REQUEST_MULTI_PERMISSIONS = 101;
    private final float[]           measured = new float[2];
  :
    @Override
    public void onLocationResult(LocationResult locationResult) {
        if (locationResult != null) {
            if (locationResult.getLastLocation() != null) {
                measured[0] = (float) locationResult.getLastLocation().getLatitude();
                measured[1] = (float) locationResult.getLastLocation().getLongitude();
            }
        }
    }
    public float getLatitude() {
        return measured[0];
    }
    public float getLongitude() {
        return measured[1];
    }
  :
    private void checkPermissions() {
        ArrayList<String> requestPermissions = new ArrayList<>();
        // GPSロケーション
        if (ContextCompat.checkSelfPermission(this, Manifest.permission.ACCESS_FINE_LOCATION) != PackageManager.PERMISSION_GRANTED)
            requestPermissions.add(Manifest.permission.ACCESS_FINE_LOCATION);
        else
            ACCESS_FINE_LOCATION = true;
        :
        if (!requestPermissions.isEmpty()) {
            ActivityCompat.requestPermissions(this, (String[]) requestPermissions.toArray(new String[0]), REQUEST_MULTI_PERMISSIONS);
        }
    }

    @Override
    public void onRequestPermissionsResult(int requestCode, @NonNull String[] permissions, @NonNull int[] grantResults) {
        super.onRequestPermissionsResult(requestCode, permissions, grantResults);
        if (requestCode == REQUEST_MULTI_PERMISSIONS) {
            if (grantResults.length > 0) {
                for (int i = 0; i < permissions.length; i++) {
                    switch (permissions[i]) {
                        case Manifest.permission.ACCESS_FINE_LOCATION:
                            if (grantResults[i] == PackageManager.PERMISSION_GRANTED)
                                ACCESS_FINE_LOCATION = true;
                            break;
                        :
                        default:
                    }
                    if (tabs == null) {
                        if (ACCESS_FINE_LOCATION) {
                            fusedlocationManager = new FusedLocationManager(context, this);
                            fusedlocationManager.startLocationUpdates();
                            long scanStart = System.currentTimeMillis();
                            runnable = new Runnable() {
                                @Override
                                public void run() {
                                    //GPS位置情報の取得判定
                                    if (measured[0] != 0 || measured[1] != 0 || System.currentTimeMillis() - scanStart > 30000) {
                                        handler.removeCallbacks(runnable);
                                        :
                                        return;
                                    }
                                    handler.postDelayed(this, INTERVAL);
                                }
                            };
                            handler.post(runnable);
                        }
                    }
                }
            }
        }
    }
◎位置情報の取得(FusedLocationManager)
FusedLocationProviderClientを使用して、GPSとネットワークから位置情報を取得します。
また、取得した位置情報を受け渡しするためのインタフェースを実装します。
:
public class FusedLocationManager extends LocationCallback {
    private static final int                    LOCATION_REQUEST_INTERVAL = 100;   //GPSデータ取得間隔(ミリ秒)
    private final Context                       context;
    private final OnLocationResultListener      listener;
    private final FusedLocationProviderClient   fusedLocationProviderClient;
    // インタフェース
    public interface OnLocationResultListener {
        void onLocationResult(LocationResult locationResult);
    }
    // コンストラクタ
    public FusedLocationManager(Context context,
                                OnLocationResultListener newListener) {
        this.context = context;
        this.listener = newListener;
        this.fusedLocationProviderClient = LocationServices.getFusedLocationProviderClient(context);
    }
    @Override
    public void onLocationResult(@NonNull LocationResult locationResult) {
        super.onLocationResult(locationResult);
        listener.onLocationResult(locationResult);
    }
    public void startLocationUpdates() {
        if (ActivityCompat.checkSelfPermission(context, Manifest.permission.ACCESS_FINE_LOCATION) == PackageManager.PERMISSION_GRANTED) {
            LocationRequest request = LocationRequest.create().setWaitForAccurateLocation(true);
            request.setInterval(LOCATION_REQUEST_INTERVAL);
            request.setPriority(Priority.PRIORITY_HIGH_ACCURACY);
            fusedLocationProviderClient.requestLocationUpdates(request, this, null);
        }
    }
    public void stopLocationUpdates() {
        if (ActivityCompat.checkSelfPermission(context, Manifest.permission.ACCESS_FINE_LOCATION) == PackageManager.PERMISSION_GRANTED) {
            fusedLocationProviderClient.removeLocationUpdates(this);
        }
    }
}
WebAPIのハンドリング
OpenWeatherMapのWebAPI は、One Call API 3.0とバージョン2.5の2種類が使用できます。基本的な仕様は同じようですが、One Call API 3.0 はHTTPS接続、バージョン2.5 はHTTP接続の違いがあります。
One Call API 3.0を使用する場合、APIキーの発行とは別にサブスクリプション契約が必要です。
◎HTTP接続
HTTP通信を行う場合は、network-security-configに接続先のドメインを指定する必要があります。
network-security-config
リソースフォルダ(res)配下に、xmlフォルダを作成し、network-security-config.xmlファイルを作成します。
<?xml version="1.0" encoding="utf-8"?>
<network-security-config>
    <domain-config cleartextTrafficPermitted="true">
        <domain includeSubdomains="true">openweathermap.org</domain>
    </domain-config>
</network-security-config>
マニュフェストファイル
マニュフェストファイルにnetwork-security-configを指定します。
<manifest
  :
    <application
        :
        android:networkSecurityConfig="@xml/network_security_config"
:◎OpenWeatherMapとの通信
OpenWeatherMapのWebAPIに接続するためのURLを組み立て、HTTPS接続(または、HTTP接続)でリクエストを行い、レスポンスをInputStreamで受け取ります。
XmlPullParserを使用して、レスポンスから目的の気象情報をタグで判別・取得します。
また、レスポンスにある天気アイコン用コードを使用して、Glideライブラリで画像ファイルをダウンロード・表示します。
import org.xmlpull.v1.XmlPullParser;
import com.bumptech.glide.Glide;
    :
    private float                       temperature;
    private float                       humidity;
    private float                       pressure;
    private String                      city;
  :
    public void openWeatherMap(float latitude, float longitude, ImageView imageView) {
        try {
            StrictMode.ThreadPolicy policy = new StrictMode.ThreadPolicy.Builder().permitAll().build();
            StrictMode.setThreadPolicy(policy);
            URL url = new URL(String.format(context.getString(R.string.request_url),
                    String.format("%s", latitude),
                    String.format("%s", longitude),
                    context.getString(R.string.API_ID)));
            InputStream inputStream = url.openConnection().getInputStream();
            BufferedReader bufferedReader = new BufferedReader(new InputStreamReader(inputStream, StandardCharsets.UTF_8));
            XmlPullParser xmlPullParser = Xml.newPullParser();
            xmlPullParser.setInput(bufferedReader);
            try {
                int eventType;
                while ((eventType = xmlPullParser.next()) != XmlPullParser.END_DOCUMENT) {
                    // <temperature value=[0] min=[1] max=[2] unit=[3]/>
                    if (eventType == XmlPullParser.START_TAG && "temperature".equals(xmlPullParser.getName())) {
                        temperature = Float.parseFloat(xmlPullParser.getAttributeValue(0));
                        // <humidity value=[0] unit=[1] />
                    } else if (eventType == XmlPullParser.START_TAG && "humidity".equals(xmlPullParser.getName())) {
                        humidity = Float.parseFloat(xmlPullParser.getAttributeValue(0));
                        // <pressure value=[0] unit=[1] />
                    } else if (eventType == XmlPullParser.START_TAG && "pressure".equals(xmlPullParser.getName())) {
                        pressure = Float.parseFloat(xmlPullParser.getAttributeValue(0));
                        // <weather number=[0] value=[1] icon=[2]/>
                    } else if (eventType == XmlPullParser.START_TAG && "weather".equals(xmlPullParser.getName())) {
                        Glide.with(this).load(String.format(context.getString(R.string.icon_url),xmlPullParser.getAttributeValue(2))).into(imageView);
                        // <city id=[0] name=[1]/>
                    } else if (eventType == XmlPullParser.START_TAG && "city".equals(xmlPullParser.getName())) {
                        city = shortCutString(xmlPullParser.getAttributeValue(1),12);
                    }
                }
            } catch (Exception e) {
                Log.d(TAG, String.format("XmlPullParser:%s", e.getMessage()));
            }
        } catch (Exception e) {
            Log.d(TAG, String.format("URL:%s", e.getMessage()));
            e.printStackTrace();
        }
    }
    public float getTemperature() {
        return temperature;
    }
    public float getHumidity() {
        return humidity;
    }
    public float getPressure() {
        return pressure;
    }
    public String getCity() {
        return city;
    }
    :
URLは、strings.xmlに定義します。
    :
    <string name="request_url">https://api.openweathermap.org/data/2.5/weather?lat=%s&lon=%s&units=metric&mode=xml&APPID=%s</string>
    <string name="icon_url">https://openweathermap-org.translate.goog/img/w/%s.png</string>>
    :
気象情報を表示する
Activity(または、Fragment)に気象情報を表示するTextView、天気アイコンを表示するImageViewを配置します。
位置情報とImageViewを引数として、OpenWeatherMapを呼び出します。
取得した気象情報はgetterを使用して、TextViewに表示します。
    :
    private TextView                    temperature;
    private TextView                    humidity;
    private TextView                    pressure;
    :
    @Override
    public View onCreateView(@NonNull LayoutInflater inflater, ViewGroup container,
                             Bundle savedInstanceState) {
        view =  inflater.inflate(R.layout.fragment_home, container, false);
        :
        // 画面項目
        temperature = view.findViewById(R.id.temperature);
        humidity = view.findViewById(R.id.humidity);
        pressure = view.findViewById(R.id.pressure);
        ImageView weather = view.findViewById(R.id.weather);
        TextView city =view.findViewById(R.id.city);
        // OpenWeatherMap
        openWeatherMap(mainActivity.getLatitude(), mainActivity.getLongitude(), weather);
        :
        temperature.setText(String.format(context.getString(R.string.format_temperature), getTemperature()));
        humidity.setText(String.format(context.getString(R.string.format_humidity), getHumidity()));
        pressure.setText(String.format(context.getString(R.string.format_pressure), getPressure()));
        city.setText(getCity());
        :
        return view;
    }
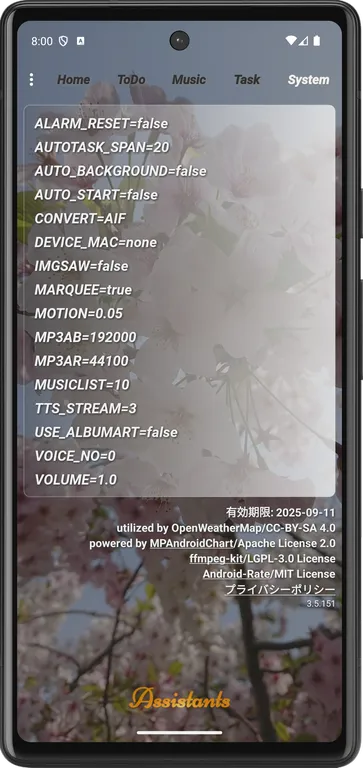
ライセンス表示
OpenWeatherMapのWebAPIは、クリエイティブ・コモンズ・ライセンスです。
アプリに著作権表示、ライセンスが記載されているサイトのリンクを配置します。

これからAndroidのアプリ開発やJavaでの開発を始めたい方へ
アプリケーション開発経験がない方や、アプリケーション開発経験がある方でも、JavaやC#などのオブジェクト指向言語が初めての方は、Androidのアプリ開発ができるようになるには、かなりの時間がかかります。
オンラインスクールでの習得を、強くおススメします。
未経験者からプログラマーを目指すのに最適です。まずは無料カウンセリングから♪

ゲーム系に強いスクール、UnityやUnrealEngineを習得するのに最適です。まずは無料オンライン相談から♪

参考になったら、💛をポッチとしてね♪


コメント欄